- Help & Advice
- How To Guides
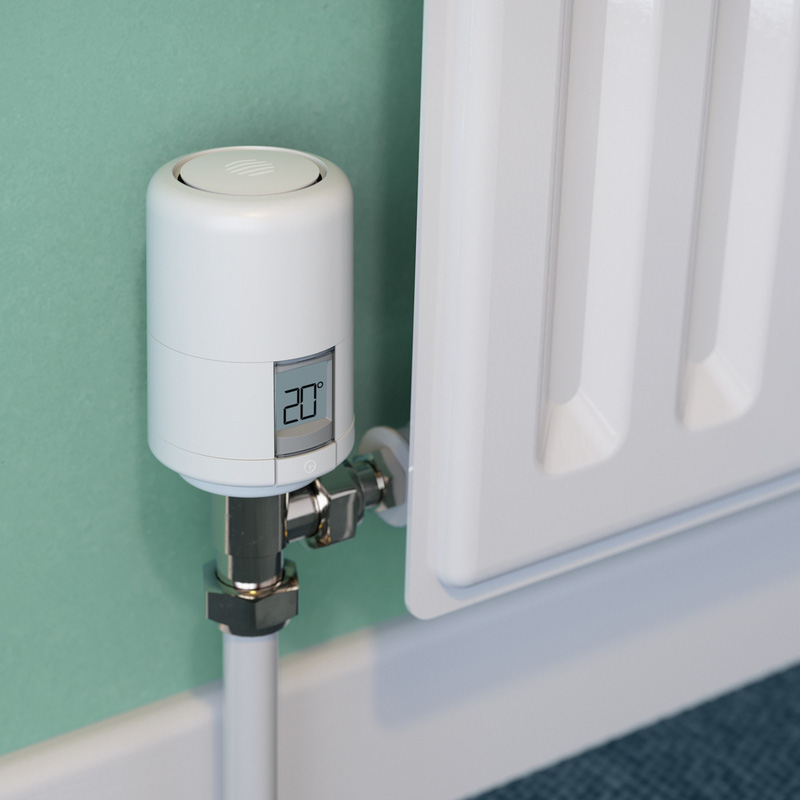
- How To Change A Radiator Thermostat

How To Change A Radiator Thermostat
A radiator thermostat, or thermostatic radiator valve (TRV), regulates the heat output from individual radiators, giving you better control over each room’s temperature. Over time, your TRV can become stuck, worn, or outdated, making it harder to maintain comfort and efficiency.
In this guide, you’ll learn how to change a radiator thermostat safely, understand why each step matters, and find tips for beginners and experienced DIYers alike.
By following these instructions, you can improve your home heating performance and potentially reduce energy costs.
Tools & Materials Needed
Before you start, gather the following:
-
New TRV / thermostatic valve
-
Radiator valve change kit (if required)
-
Bucket or tray (to catch water)
-
Towels or cloths (for drips)
Step 1: Turn off the Boiler
Why it matters: Working on a live heating system can be dangerous and cause leaks.
-
Switch off the central heating boiler.
-
Allow radiators and pipework to cool completely before touching them.
Step 2: Prepare the Heating System
Why it matters: Draining or isolating water prevents flooding.
-
Turn the lockshield valve on the radiator clockwise to close it.
-
Place a bucket or tray under the radiator to catch any water.
-
Use a radiator key to slightly open the bleed valve and release pressure.
Step 3: Remove the Old TRV/Valve
Why it matters: Removing the faulty valve safely ensures a clean installation.
-
Loosen the TRV nut with an adjustable spanner.
-
Carefully remove the valve body. Expect some water to spill—use towels to protect the floor.
-
Inspect the pipework for corrosion or damage before fitting the new valve.
Step 4: Install the New Radiator Thermostat
Why it matters: Correct installation prevents leaks and ensures accurate temperature control.
-
Wrap PTFE tape around the valve threads to create a watertight seal.
-
Attach the new TRV, tightening the nut with an adjustable spanner (avoid overtightening).
-
Make sure the valve orientation allows proper movement of the thermostat head.
Step 5: Refill and Test the System
Why it matters: Proper testing ensures the radiator heats correctly and there are no leaks.
-
Close the bleed valve.
-
Open the lockshield valve and refill the radiator if needed.
-
Turn the boiler back on and check the radiator for leaks.
-
Adjust the thermostat to confirm it regulates the temperature effectively.
Shorts / Quick‑Take Version
-
Turn off the boiler and let radiators cool.
-
Close lockshield, open bleed valve, catch water in a tray.
-
Remove old TRV with an adjustable spanner.
-
Fit new valve with PTFE tape, tighten, and orient correctly.
-
Refill radiator, check for leaks, test heating function.
Frequently Asked Questions
Do I need to drain the entire heating system?
What if water continues to flow after removing the valve?
Can I replace any type of TRV?
Do I need PTFE tape?
How do I know if my TRV is faulty?
Can I do this myself if I’m a beginner?
Will changing the TRV improve energy efficiency?
When to Call a Professional
Call a qualified heating engineer if:
- Pipework is corroded or damaged.
- System pressure issues or leaks persist after fitting.
-
You’re unsure about isolating the radiator or boiler safely.
-
You encounter unusual radiator configurations or concealed pipework.